Configure existing email account in Outlook to send and receive email
through VPOP.
If you have not sent mail through VPOP in the past please contact
us first so we can enable your account to use us for SMTP
1.
Open Outlook.
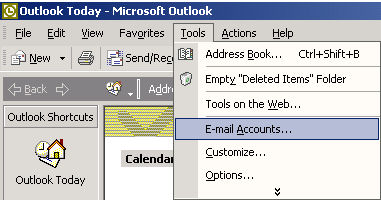
2. From the tools
menu, choose E-mail Accounts.
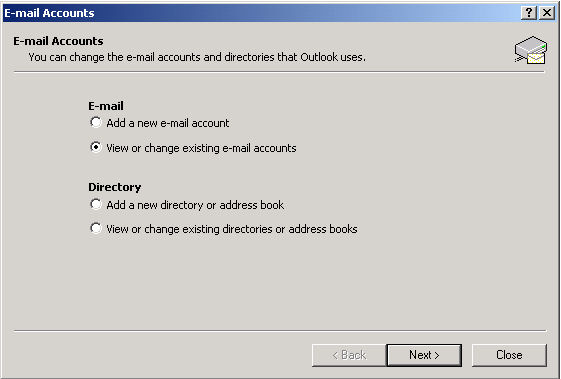
3.
Click the View or change existing e-mail accounts button in the
E-mail area.
4.
Click the Next button.
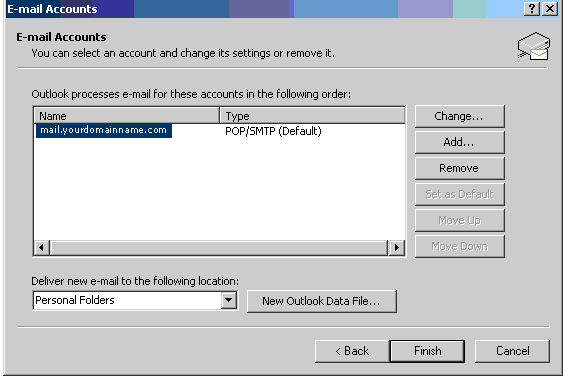
5.
Choose the email account you want to set up to send through VPOP.
6.
Click the Change button.
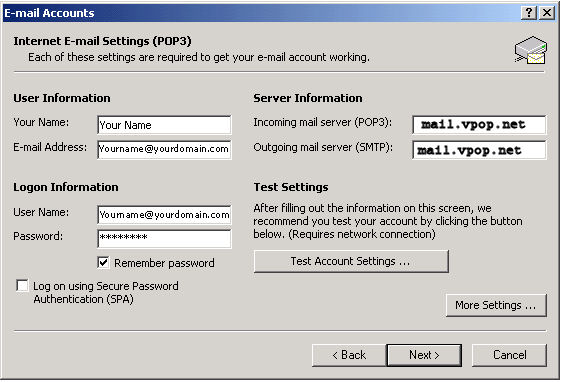
7.The Incoming mail server (POP3) and the
Outgoing mail server (SMTP)
fields should be set to mail.vpop.net.
The User
Name must be set
to your full email address (eg.
johnsmith@yourdomain.com)
8.
Click on the More Settings
button.
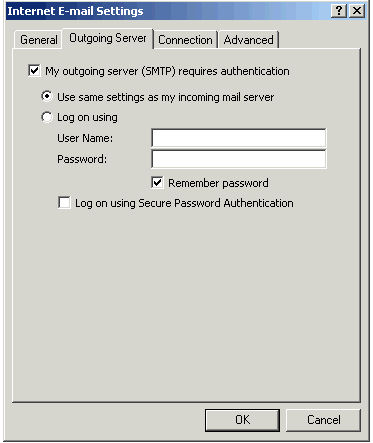
9.
Click on the Outgoing Server tab.
10.
Check the box next to My
outgoing server (SMTP) requires authentication.
11.
Select Use same settings as my incoming mail server.
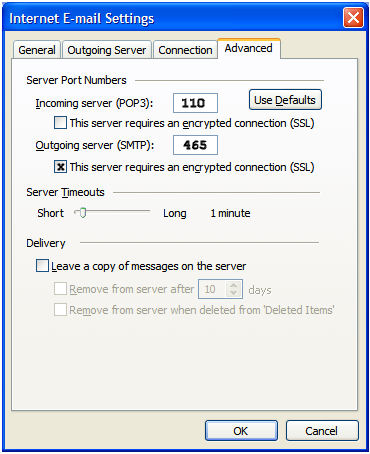
12.
Click on the Advanced tab.
13.
Make sure the Incoming Server
port is set to 110.
14.
Check off the box that says This
server requires an encrypted connection (SSL).
15.
Change the Outgoing Server
port to 465.
16.
Click OK. Click Next.
17.
Click the Finish button.
That should do it. You should now be able to send and receive
mail through VPOP in Outlook.